My Witch’s Night Game

In this blog post, I’ll walk you through the process I used to create this parallax effect in Phaser 3, along with the code snippets to bring it all together.
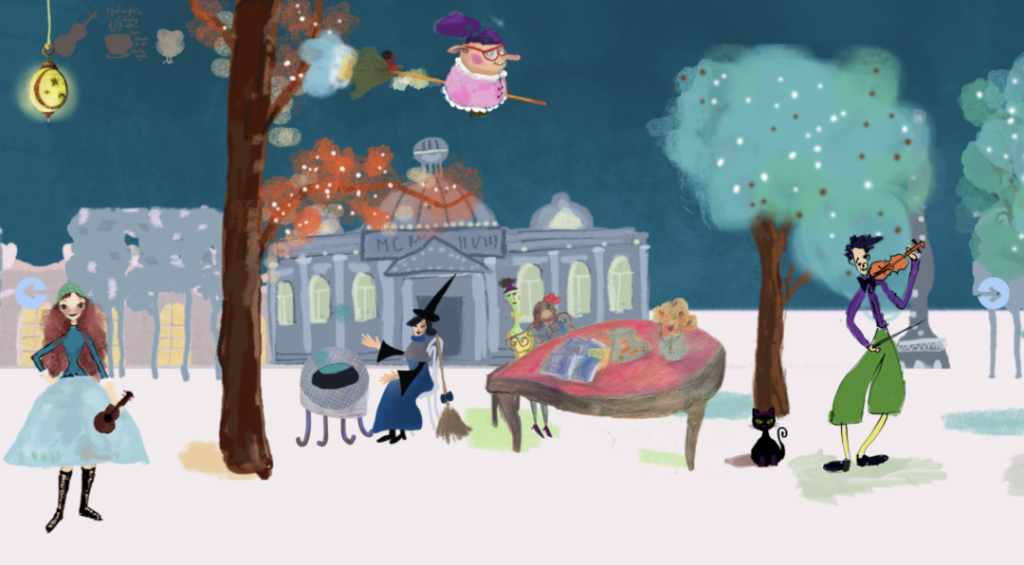
All the illustrations and artwork in the game are entirely my original work, created both digitally and on paper. These illustrations have been with me for about 15 years, and they’ve finally found their place in this interactive world.
For my Halloween-themed game Witch's Night, I wanted to achieve a dynamic parallax effect that would create depth and movement in the scene. The effect would consist of three layers—foreground, midground, and background—each scrolling at different speeds. I also integrated interactive objects within the foreground layer, making the scene come alive with animations and sound effects.
The Setup
I structured the parallax effect using Phaser’s tileSprite objects, which are ideal for scrolling backgrounds. Here’s a quick overview of how the layers work:
Background:Moves the slowest, giving the impression of distant scenery.Midground:Moves slightly faster than the background.Foreground:Moves the fastest and includes interactive objects that respond to user inputs.
Let’s take a look at the core function responsible for setting up the parallax:
create() {
  // Background layer (farthest from the player)
  this.sky = this.add.tileSprite(0, 0, 3071, 417, "sky").setOrigin(0, 0).setDepth(0);
  this.sky.setScale(1.2);

  // Midground layer
  this.midground = this.add.tileSprite(-350, this.scale.height - 770, this.scale.width, 447, "midground")
                      .setOrigin(0, 0)
                      .setDepth(2);
  this.midground.setScale(1.2);

  // Foreground layer (closest to the player, includes interactive elements)
  this.foreground = this.add.tileSprite(1050, 75, 3071, 476, "foreground")
                        .setOrigin(0, 0)
                        .setDepth(3);
  this.foreground.setScale(1.3);
}
Adding Motion
To create the scrolling effect, I update the x-coordinates of each layer in the update method, where the speed varies depending on the depth of the layer:
update() {
  this.sky.tilePositionX -= 0.2; // Slowest movement
  this.midground.tilePositionX -= 0.4; // Moderate speed
  this.foreground.tilePositionX -= 0.8; // Fastest speed
}
This results in a smooth parallax effect where each layer moves at a different speed, enhancing the sense of depth.
Adding Interactive Elements
I wanted the player to feel engaged with the scene, so I added various interactive objects—witches, trees, a piano, and more—that respond to user actions like clicks and hovers. Using a custom utility function, setupInteractiveAnimation, I ensured that each object has unique animations and sounds.
Example: Interactive Piano
For the interactive piano, I created an animation and played a sound effect whenever the player clicks on it. Here’s the setup:
// Create static piano image and set interactivity
this.staticPiano = this.add.image(970, 600, "staticPiano").setInteractive({ cursor: "pointer" }).setDepth(10);

// Define piano animation
this.anims.create({
  key: "pianoAnim",
  frames: this.anims.generateFrameNumbers("pianoAnim", { start: 0, end: 4 }),
  frameRate: 3,
  repeat: 3
});

// Use utility function to handle interactivity and animation
setupInteractiveAnimation(
  this,
  this.staticPiano,
  "pianoAnim",
  "pianoSound",
  this.staticPiano.x,
  this.staticPiano.y,
  10,
  1 // scale
);
The setupInteractiveAnimation function simplifies setting up animations and sounds for each object, making it easy to add interactive elements with minimal code repetition.
Interactive Lantern
I also added a glowing lantern in the foreground. It gently sways back and forth, and when clicked, it reveals a hidden clue. This small interaction adds an element of mystery:
this.lantern = this.add.image(100, 0, "lantern")
                  .setOrigin(0.5, 0)
                  .setDepth(19)
                  .setInteractive({ cursor: "pointer" });

this.tweens.add({
  targets: this.lantern,
  angle: { from: -7, to: 7 },
  duration: 2000,
  yoyo: true,
  repeat: -1,
  ease: "Sine.easeInOut"
});

// Show clue on click
this.lantern.on("pointerdown", () => {
  this.showClue("yellow"); // Custom function to show clues
});
The combination of parallax and interactivity resulted in a rich and engaging visual experience for the player.
Conclusion
The parallax effect in Witch's Night, not only brings depth to the scene but also sets the stage for an interactive environment filled with surprises. With a few tweaks, you can create similar effects for your own projects using Phaser 3!
If you’re interested in trying out the game or have any questions about the code, feel free to drop a comment below or check out the live demo here.
Happy coding, and have a spooky Halloween! 🎃
